An embroidery file (DST, PES…) is not a picture: it's a needle trajectory. Once the machine starts, there's no going back — which is why ten minutes of methodical checking before pressing Start pays for themselves. Here's what to look at, in order.
Read the stitch trace
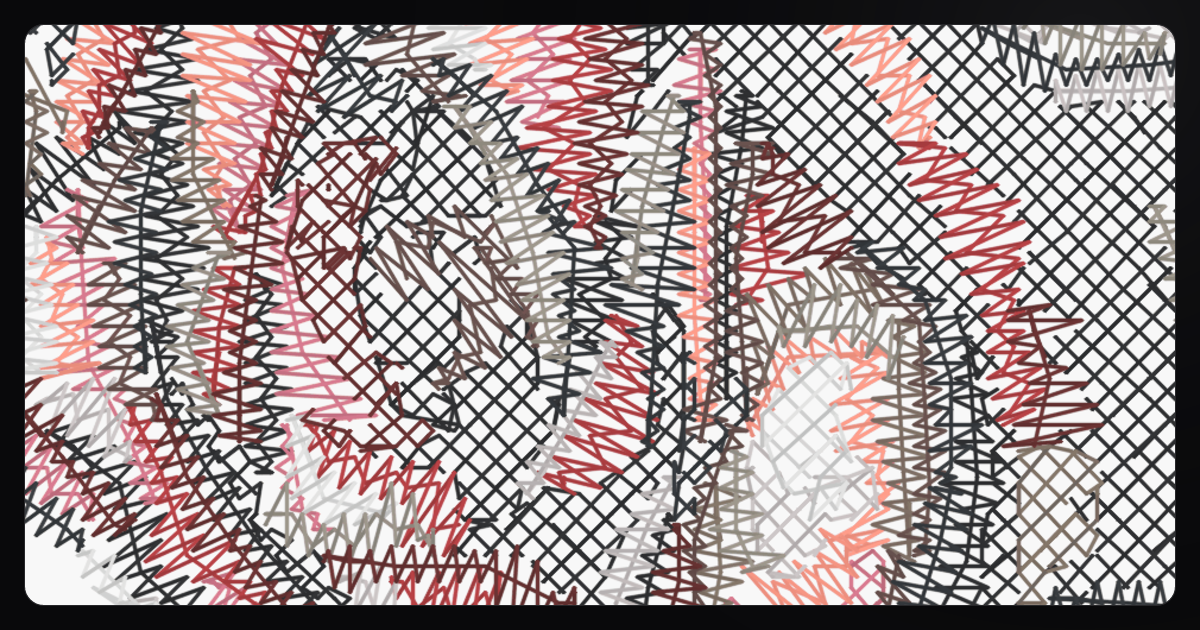
The simulator replays the design exactly as it will be sewn: color order, fill direction, transitions between areas. From afar you judge the silhouette; up close, the stroke. Zooming reveals a file's true qualities: regular satin outlines, angled tatami fills whose direction varies from one area to the next to catch the light, holes that are genuinely open (letters, letter counters, cut-outs).
The warning signs
- Fused details: letters that clog, strokes that vanish — the design is too small for its density (or too dense for its size).
- Filled holes: the inside of an O or an A stitched over when it should stay open.
- Long uncut jumps: big needle travels between two areas, leaving visible connecting threads.
- Many colors for little surface: every color change stops the machine and adds a chance of loading the wrong bobbin.
The worksheet: threads, yardage, dimensions
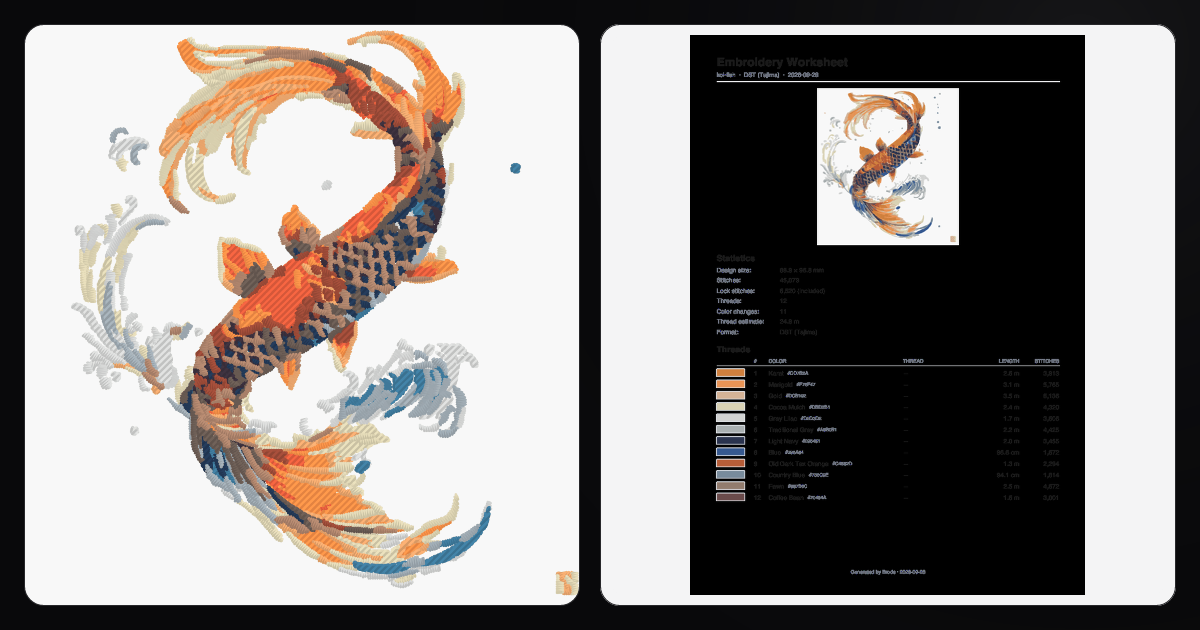
The PDF worksheet is the design's ID card: thread numbers in sewing order (matched to the Madeira Polyneon chart), thread length per color, stitch count, color stops, real dimensions in millimeters. It turns checking into a routine: you prepare the bobbins from it and confirm the total yardage is sensible for the chosen fabric.
Measure the real size, not the on-screen size
A design that looks great on screen can be a disaster at 40 mm: readability thresholds (letter thickness, detail size) depend on real millimeters, not pixels. The simulator shows the design's physical size — always check it against the target: cap circle, polo chest, jacket back each have their own maximum dimensions.
The pre-flight checklist
- Real size checked against the target garment.
- Zoom done on letters and small details.
- Color order read from the worksheet, bobbins prepared in order.
- Fabric suited to the design's density (fleece wants less density than twill).
In embroidery, one minute of simulation saves an hour of re-hooping: the fabric won't un-sew itself.
To train your eye on a stitch trace, the stitch simulator opens DST, PES, JEF and VP3 files for free, no account needed. And to prepare a clean logo before you get there: embroidering a logo step by step.